Saturday, December 31, 2011

Pizzelles

I have been so busy baking this holiday season and unfortunately haven't had time to blog. I have made sugar cookies, chocolate chocolate chip cookies, ginger cookies, gingerbread men and houses, pizzelles, pignoli cookies, one trifle and a red velvet cake. It's sort of gross to think all of this happened over the course of 3 weeks. I love pizzelles. Are they a crowd pleaser? No, not necessarily...but that doesn't stop me from making them, especially during Christmas. They scream out Christmas to me. Crisp snowflake shaped cookies flavored with almond extract and then dusted with confectioner's sugar - what is not to love? I must have been Italian in a previous lifetime.

The batter comes together in no time and cooking them in the pizzelle maker is quick.

Pizzelle Batter
Pizzelle Maker
Pizzelles


Pizzelles
Recipe adapted from Betty Crocker's Cookie Book
Yield: About 3 1/2 dozen cookies

2 cups all-purpose flour
1 cup sugar
3/4 cup butter, melted and cooled
1 T almond, anise or vanilla extract (original calls for 1 Tablespoon, I like to add 2 Tablespoons for added flavor)
4 eggs, slightly beaten

Heat pizzelle iron according to manufacturer's directions. Mix all ingredients in a medium bowl. Drop 1 tablespoon batter into heated pizzelle iron; close. Cook about 30 seconds or until golden brown. Carefully remove pizzelle from iron. Cool on wire rack. Repeat until all batter is used. Dust with confectioner's sugar, if desired.

Double Chocolate Valentine Cake

For my birthday last year, my husband bought me Rose's Heavenly Cakes by Rose Beranbaum. Rose is also the author of The Cake Bible, a book I also own. The Cake Bible has been a trusty resource over the past few decades, but I'm so glad she published another cake book. I wish I could say I've tried more of the recipes in the newer book - I have made the Torta De Las Tres Leches Cake, the Banana Refrigerator Cake with Creamy White Chocolate Frosting and now the Double Chocolate Valentine Cake. Whenever I look at her book, I tend to feel overwhelmed. I know without a doubt that these are great recipes, but I know it will take me hours to complete.

The Double Chocolate Cake did take many hours from start to finish, but I was very happy with the results. It is not an overly sweet cake and packs quite a bit of chocolate and fudgey goodness into one slice. I ran out of raspberries so my cake isn't quite as beautiful as it could have been...oh well. The name of the cake clearly makes it a great choice for February 14th. Bake it in a heart shape and share it with the one(s) you love. I think this cake deserves to be served year-round.

Cocoa and hot water

Flour, Sugar, Baking powder, Salt, Cocoa mixture and Butter

Cake Batter in greased and floured pan

Ganache Glaze

Poke Holes with skewer and brush on Ganache Glaze

Top with fresh Raspberries

Raspberries glazed with Red Currant Jelly

Dig in!

Because I am lazy, I will provide a link to the recipe on GlobalGourmet.com.
Double Chocolate Valentine Cake recipe.

Wednesday, October 19, 2011

Beef and Barley Soup

Beef and Barley Soup

What is it about food that is so comforting? This soup is a one pot dish that will warm your bones on a cold winter night. It is akin to Chinese porridge, but a jazzed up version. What I love about this dish is that you don't need to measure everything. Chop up veggies and throw them in a pot. The only thing I measure is the barley. You need 3 hours to simmer the soup so plan ahead.

Sometimes I eat out of boredom or eat when I'm stressed, but food doesn't fill a void or relieve anxiety. It is a distraction that can lead to over-consumption. So even though yummy food can make you happy and provide comfort, eat in moderation and develop a healthy relationship with food. Okay, I know I sound like I am preaching, but really it's also a reminder to myself. We all want to be healthy and feel good - make smart choices and only eat when you are hungry.

Beef and Barley Soup
Yields approximately 3 large servings

Notes: I normally use water since I don't have beef stock on hand. I find it necessary to use Dashida to flavor the soup. I don't like that it contains MSG so if you can find a MSG-free soup base, buy that. My Korean market used to have it but no longer carries it. I like my soup with a lot of meat, but if you don't only make the soup with 2 pieces of short ribs. I am hesitant to call it soup since it cooks down to a porridge-like consistency. If you want to keep yours more soup-like, add more water towards the end.

2-4 pieces meaty short ribs
3 garlic cloves, chopped
1 onion, diced
1 large carrot, diced
1 stalk celery, diced
1" - 2" piece of Parmigiano-Reggiano rind
1 t chopped fresh thyme
2 T chopped parsley or chives
2 t Dashida Beef Flavor Soup Stock (see Notes above)
Salt and Pepper to taste

1. Place the short ribs in a large pot.

2. Add 1/2 cup of barley, three big cloves of garlic chopped up, the chopped onions, carrots and celery. You can also add mushrooms and any other vegetables you might like. Grind in a little black pepper.

3. Add about eight cups of filtered water or beef stock and let it simmer on the back burner for at least three hours while you go about your business. You can also add lima beans, cube potatoes, peas, corn, string beans and chopped tomatoes at any point, or the second day, should you have any leftover.  During the last hour of cooking add the thyme and Parmigiano-Reggiano rind and Dashida soup stock.

4. Before serving, skim off the fat–there will be a bit, as short ribs are quite fatty. Pull the meat off the bones, chop it and put it back in the soup. Season with salt and pepper to taste.  Ladle the soup into bowls and serve with chopped parsley or chives on top.

Pain de Mie

Shiny New Pullman Loaf Pan

There is something very gratifying about making bread.  Is it the amazing aroma while it's baking?  Or is it simply making a product that cannot compare to most store-bought breads?  Whatever the reason, I am hooked on bread making. I think I have overcome my fear of it and I am no longer aghast when sprinkles of flour hit the floor.

My new Pullman loaf pan arrived at my doorstep today. I had gone food shopping in the morning and bought various snacks and cold cuts for my son's lunches this week. Although I had clearly written BREAD on my shopping list, my mommy brain managed to forget this critical item. Normally I would make another trip to the supermarket, but having received my new pan I took it as a sign to make bread.

If you have never made bread before this would be a great place to start.  This recipe was super easy and quick compared to most breads.  I started making the dough at 2:30pm and the baking was done by 5:30pm. Everything is mixed and kneaded in the standing mixer. It is a nice bread for sandwiches or toast.


First Rise
Punched down dough transferred to pan to rise again

Cool on a rack

Definitely not Wonder bread

So good

Pain de Mie
From The Paupered Chef
Yield: 1- 13 x 4 x 4 loaf

Note: I used 24 ounces of AP flour and 3 ounces of bread flour simply because I ran out of AP flour.

1 1/3 cups whole milk
3/4 cup water
1.15 ounces (about 2 1/3 tablespoons) sugar
1/2 ounce (about 1 1/3 tablespoons) dry yeast
27 ounces all-purpose flour*
.85 ounces (about 1 1/2 tablespoons) salt
2.6 ounces (about 6 tablespoons) soft butter

1. Pour the milk and water into a small pot. Turn the heat to medium-low and slowly bring the temperature up to 100 degrees. Turn off the heat and add the sugar. Stir until disolved.

2. Pour the liquid into a medium-sized bowl and stir in the yeast. Let the mixture proof for ten minutes.

3. Combine the four and salt in stand mixer. Use the dough hook to quickly mix the two.

4. Make a well in the flour and pour in the liquid. Mix carefully on low until incorporated. Then add the butter.

5. Increase the speed to medium and let the stand mixer knead for 10 minutes.

6. Remove the dough from the bowl, form into a ball, and place in a large bowl. Cover with plastic wrap and let the dough rise for an hour.

7. Butter your 13 x 4 x 4 Pullman loaf pan. Punch down the dough, and then transfer to the loaf pan. Cover again with plastic wrap and let rise until it comes to the top of the pan. Preheat the oven to 400 degrees.

8. Slide the top on of the pan on. Place loaf pan in the oven and cook for 45 minutes. Remove the bread from the pan and let cool on a wire rack.

Friday, October 14, 2011

BLT And More

I made two loaves of Challah bread today. They freeze nicely so they will last for a while. When did I turn into this homemaker who makes her own bread, bagels and ice cream?! I think my life was busy enough and now I am trying to keep up with the rapid rate at which these food items are consumed. Anyway, I wasn't in the mood to make dinner and my choices were make fried rice for the umpteenth time or make a sandwich. The kids were already fed so this meal is just for my husband and me. The sandwich was the easy pick and I had all the ingredients to make a BLT. I roasted grape tomatoes in the oven with oil, S&P. I combined Sriracha Hot Chili Sauce and Kewpie Mayonnaise for the mayo component (thank you Sandy!). I used thick cut bacon then topped it with crumbled blue cheese and slices of Asian Pear.

The result was quite lovely. I don't know if I have ever called a sandwich lovely, but this one is. It is an interesting combination of sweet, salty, spicy, and crispy. There is no recipe but here are some tips:

1. Slice the bread on the thin side so the bread doesn't overwhelm the filling. Lightly toast the bread like I did.
2. Make the spicy mayo as mild or spicy as you wish. I wanted some kick so added more Sriracha.
3. Go light on the blue cheese.
4. You can do two layers of the lettuce, tomatoes and mayo - one on the bottom and another on top of the bacon.
5. Don't skip the Asian pear - the texture and flavor is nice.


Challah slices with lettuce

Add Roasted Tomatoes

Drizzle on the Spicy Mayo

Top with Applewood Bacon

Add more Lettuce,  Blue Cheese and Asian Pear slices

BLT and more!

Wednesday, October 12, 2011

Caramel Popcorn

Caramel Popcorn

MMMMmmmm...popcorn. I am partial to savory popcorn - make it cheesy or buttery and I can wolf it down before the opening movie credits start. A tub of caramel popcorn will still disappear but not with quite the same speed or voracity. If you are a popcorn lover like me, make this as a special treat. I put together a gift basket and the caramel popcorn was my one homemade addition.

When you cook the sugar to make the caramel, but sure to use caution and do not rush. Cooked sugar bubbles up and if you don't handle it carefully you will get a nasty burn. I found making a half batch easier to manage. Below is the full recipe.


Cooking the Sugar, Water, Butter and Salt

Spread it out on a pan to cool

Sweet Buttery Goodness

Caramel Popcorn

Yields about 4 quarts

Nonstick cooking spray or vegetable oil
3 tablespoons vegetable oil
1/2 cup popcorn kernels
2 cups salted peanuts (optional)
1 1/2 teaspoons baking soda
3 cups sugar
3 tablespoons unsalted butter
Pinch of kosher or coarse sea salt

Lightly coat two large, heatproof rubber spatulas, a very large mixing bowl and two large baking sheets with nonstick cooking spray or a thin slick of oil.

In a large saucepan or pot with a lid, heat the oil over medium-high heat. Add the popcorn kernels, cover and keep the saucepan moving until all of the kernels have popped, about 5 minutes. Transfer to the prepared bowl, removing any unpopped kernels. Toss with salted peanuts, if using.

Have the two large baking sheets ready. In a medium saucepan, combine the sugar, butter, salt and 1/2 cup water. Cook over high heat, without stirring, until the mixture becomes a light golden-yellow caramel, 10 to 14 minutes. Remove from the heat and carefully whisk in the baking-soda (the mixture will bubble up).

Immediately pour the caramel mixture over the popcorn and don’t fuss if it doesn’t all come out of the pot — you’ll have plenty. Working quickly and carefully, use the prepared spatulas to toss the caramel and popcorn together, as if you were tossing a salad, until the popcorn is well coated.

Spread the popcorn onto the baking sheets and quickly separate them into small pieces while still warm. Cool to room temperature, about 15 minutes. Once cool, store in an airtight container for up to two weeks.

Monday, October 3, 2011

Ice Cream Cake

Homemade Ice Cream Cake

Yesterday was an awesome day. My youngest son turned 3 and my over 3 month bathroom renovation is now complete. To celebrate the birth of my wild child, I decided to make him an ice cream cake. Whenever we go grocery shopping he ogles the Carvel cakes in the freezer section. At first I thought I would just purchase pints of ice cream and then make cake or cookie crumbs to layer between. But then I thought what a pain it would be to soften the ice cream to get it into the cake pan. So instead I made my own ice cream (yes, I know my reasoning is dizzying).

I made chocolate wafer cookies then crumbled them for the base of the cake. Next came the chocolate ice cream from David Lebovitz's The Perfect Scoop. I never was a fan of chocolate ice cream as a child, but living with the 3 chocoholics in this house has changed me into a chocolate lover. This chocolate ice cream is probably the BEST I've ever had. I am NOT exaggerating. Make it with Valrhona cocoa powder. The top layer was vanilla ice cream (French-style, made with eggs), recipe also from The Perfect Scoop. The birthday boy enjoyed his cake, but I'm sure he would have been just as happy with the store-bought version. I didn't take any pictures on my camera of the cake out of the pan. If I can get one from my sister I will post an update. Happy Birthday to my little man.

Chocolate Wafer

Chocolate Wafer Crumbs

Chocolate Wafers recipe as posted on Smitten Kitchen.

Chocolate Ice Cream
from The Perfect Scoop by David Lebovitz

2 cups heavy cream
3 tbsp unsweetened Dutch-proces cocoa powder
5 oz bittersweet or semi-sweet chocolate, chopped
1 cup whole milk
3/4 cup sugar
pinch of salt
5 large egg yolks
1/2 tsp vanilla extract

Warm 1 cup of cream with cocoa powder in medium saucepan, whisking to thoroughly blend the cocoa. Bring to boil then reduce heat and gently simmer for 30 seconds, whisking constantly. Remove from heat and stir in chocolate until smooth. Stir in remaining cup of cream. Pour mixture into a large bowl, scraping the saucepan as much as possible. Set mesh strainer atop the bowl. Warm milk, sugar, and salt in the same saucepan.

In a separate medium bowl, whisk together the egg yolks. Slowly pour the warm milk into the egg yolks, whisking constantly, then scrape the warmed yolks back into the saucepan. Stir mixture constantly over medium heat making sure the scrape the bottom and corners, until the mixture thickens and reaches nappe consistency. Pour custard through strainer and stir it into the chocolate until smooth, then stir in the vanilla. Continue to stir over ice bath until cool. Refrigerate the mixture to cool thoroughly and then freeze it in your ice cream machine per the manufacturer’s instructions. Yields 1 quart.

Vanilla Ice Cream recipe

Add on Chocolate Ice Cream and Vanilla Ice Cream

Saturday, October 1, 2011

The Best Cocoa Brownies

Cocoa Brownies

I will probably spend a lifetime searching for my perfect brownie. It's a tough job but someone has to do it. I'm not even sure what exactly I'm searching for, but I know I haven't found it yet. This recipe by Alice Medrich is very decadent and deliciously silky. I splurged on Valrhona cocoa powder - $9.99 at Fairway Market. Normally I stick to the less expensive brands such as Droste or Rademaker, but this recipe needs the super dark richness of the Valrhona. The recipe yields a very thin brownie, but being it is so rich it's probably a good thing they are small. If you like thick brownies, double the recipe.

Valrhona Cocoa Powder

Butter, Cocoa Powder Salt and Sugar

Ready to be baked

Cut into 16 squares

Best Cocoa Brownies
Adapted from Alice Medrich’s Bittersweet

Makes 16 larger or 25 smaller brownies

10 tablespoons (1 1/4 sticks) unsalted butter
1 1/4 cups sugar
3/4 cup plus 2 tablespoons unsweetened cocoa powder (natural or Dutch-process)
1/4 teaspoon salt
1/2 teaspoon pure vanilla extract
2 large eggs, cold
1/2 cup all-purpose flour
2/3 cup walnut or pecan pieces (optional)

Position a rack in the lower third of the oven and preheat the oven to 325°F. Line the bottom and sides of an 8×8-inch square baking pan with parchment paper or foil, leaving an overhang on two opposite sides.

Combine the butter, sugar, cocoa, and salt in a medium heatproof bowl and set the bowl in a wide skillet of barely simmering water. Stir from time to time until the butter is melted and the mixture is smooth and hot enough that you want to remove your finger fairly quickly after dipping it in to test. Remove the bowl from the skillet and set aside briefly until the mixture is only warm, not hot. It looks fairly gritty at this point, but it smooths out once the eggs and flour are added.

Stir in the vanilla with a wooden spoon. Add the eggs one at a time, stirring vigorously after each one. When the batter looks thick, shiny, and well blended, add the flour and stir until you cannot see it any longer, then beat vigorously for 40 strokes with the wooden spoon or a rubber spatula. Stir in the nuts, if using. Spread evenly in the lined pan.

Bake until a toothpick plunged into the center emerges slightly moist with batter, 20 to 25 minutes is Medrich’s suggestion (I pulled mine out at 25 minutes and they were perfectly set). Let cool completely on a rack. (If you refrigerate after cooling, it will be easier to cut neatly)

Lift up the ends of the parchment or foil liner, and transfer the brownies to a cutting board. Cut into 16 or 25 squares.

Friday, September 9, 2011

Turnip Cake

Chinese Sausage, Rice Flour, Dried Shrimp, Daikon Radish and Scallions

As a young child I remember my grandmother buzzing around the kitchen to make turnip cake. It seemed like a huge production as if she were making turnip cake for a whole village. Lately I find myself thinking about my family history and realizing how little I know about those that came before me. I am longing to learn about my grandparents and anything that will bridge me to my Taiwanese heritage. A part of me wonders if I will find a missing part of myself when I make a connection to the past. More importantly, I want to be able to tell my kids about their family history when they are old enough to ask. My turnip cake was nowhere near as good as my grandmother's but I think she would still be proud.

This was my first time making turnip cake. I expected it to be a daunting task, but it really was quite easy. If I could do it all over again, I would add more shredded turnip - the recipe called for 2 1/2 to 3 cups of shredded daikon and I went on the lower range. I wanted to taste more of the turnip. Being a saltaholic, I would add a touch more salt as well. Below is the recipe as is, feel free to incorporate the changes if you wish.

Shredded Daikon

Chopped Dried Shrimp, Scallions and Chinese Sausage

Ready to be steamed

Cooling the Turnip Cake

Pan-fry until golden brown

Serve with Oyster Sauce

Turnip Cake
Yield one 8x8 pan or one 9" cake pan

2 1/2 - 3 cups (lightly packed) Coarsely Shredded Daikon Radish
1 1/2 Cups Water
3 T Dried Shrimp, optional (soaked in hot water then drained)
1 Chinese Sausage, finely diced
2 Scallions, finely chopped
2 Cups Rice Flour (* Important note - use rice flour, do not use sweet/glutinous rice flour)
1 t salt (adjust up if not using shrimp)
1/2 t Sugar
Vegetable/Canola Oil for frying

1 - Place shredded radish in a small pot or saucepan with water. Bring mixture to a boil, than reduce the heat to a low and simmer for 15 minutes or until tender, stirring occasionally. Remove from heat. Remove radish from liquid(do not discard the cooking liquid) and place in measuring cup. Add in cooking liquid to bring the amount to approximately 3 cups. Let the mixture cool to a lukewarm temperature.

2 - While radish is cooking, heat 2 teaspoons of oil in a skillet or wok. When oil starts to smoke add the Chinese Sausage, scallions, and dried shrimp. Stir fry for 1 or 2 minutes. Remove the mixture from heat. Place a double-boiler on the heat with plenty of water to get the steamer hot.

3 - In a bowl mix the rice flour, salt, and sugar. Add the radish and cooking water, and stir to a batter-like consistency. Add the Chinese sausage mixture to the batter and mix. Pour mixture into a 8x8 cake pan, or a 9-inch round cake pan.

4 - Place cake pan into steamer, and steam at a medium-high boil for 35-45 minutes.

5 - Once done, remove the turnip cake from the steamer and let cool. Slice the turnip cake and pan-fry in oil until golden brown.

Tuesday, September 6, 2011

Mixed Green Salad with Figs, Blue Cheese and Pine Nuts

Close up of Figs, Blue Cheese and Pine Nuts on top of Mixed Greens

I think food is beautiful. Cut into a fresh fig and look at all the colors - purple, pink, white and green - this is one good-looking fruit. Add it to a fruit plate or salad and it will surely make it pretty. If ripe, figs are sweet and delicious. I don't buy them often, but when I do I am reminded of how special they are. Go out and buy some while they are still in season. Here in the Northeast they will be around for a few more weeks.

Ready to be tossed with dressing

Mixed Green Salad with Figs, Blue Cheese and Pine Nuts
1/2 lb. Organic Mixed Greens
5 Fresh Figs, cut into quarters (or sixths, if large)
1/3 cup Pine Nuts, toasted
4 ounces Danish Blue Cheese, crumbled (I used the Rosenborg Castello brand)

Place pre-washed mixed greens into a large serving bowl. Arrange figs along the perimeter of the bowl and a few in the center. Sprinkle blue cheese then pine nuts on top of greens and figs. Serve with Sherry-Shallot Vinaigrette (recipe below).

Sherry-Shallot Vinaigrette
1/4 cup Sherry Vinegar
1/2 Shallot, chopped
1/4 T butter
1 t Country Dijon mustard, regular Dijon can be substituted
1 T Honey
1 t Chopped Fresh Thyme
3/4 cup olive oil
1/2 t salt, plus more if needed
Freshly ground black pepper to taste

In a small saute pan, cook chopped shallots in butter until very lightly browned. Combine cooked shallots, sherry vinegar, mustard, honey, thyme, salt and pepper in a blender, bowl or tall narrow plastic container (if using immersion blender). Blend, whisk by hand or use the immersion blender to mix the ingredients. Slowly add the olive oil while blending to emulsify the vinaigrette. Adjust seasoning if necessary.

Monday, September 5, 2011

Jacques Torres Chocolate Chip Cookies

Jacques Torres Chocolate Chip Cookie

The search for the perfect Chocolate Chip Cookie continues...
I stumbled upon Crepes of Wrath while perusing TasteSpotting for yet another cookie recipe. Sydney from Crepes of Wrath totally reeled me in with one of her cookie photos of Jacques Torres Chocolate Chip cookies. I tried this recipe many years ago when it was printed in the NY Times. I recall it being interesting because it uses bread flour and cake flour. All other traditional chocolate chip cookie recipes use all-purpose flour. Given the rave reviews I was willing to give this recipe another try.

If memory serves, I'm fairly certain I cut down on the salt and didn't let the dough rest for the recommended time. All those years ago I also used Toll House chocolate chips. Armed with more experience, I felt confident I would yield a better result. The dough needs to rest in the refrigerator for 24-36 hours or up to 72 hours. I'm not sure why this is crucial, but just do it. Maybe the resting period helps the flavors marry (or at least become friends =P).

You have to try one of these cookies warm. There are no ifs, ands, or buts, you will be hard pressed to find a better cookie than this. The edges are crisp, the inside is soft and slightly chewy. The chocolate oozed onto my shorts. Normally that would make me mad, but in this case I took it as a sign of an awesome cookie. My one criticism of the cookie is that it is definitely saltier than most cookies I've ever had. My husband liked the salt, but it bothered me a little. For now, this cookie takes the top spot in the recipe box. Will that stop me from trying others? Of course not.

Combination of Callebaut Semisweet and Ghirardelli Bittersweet Chocolates

Butter, Sugars, Vanilla, Eggs

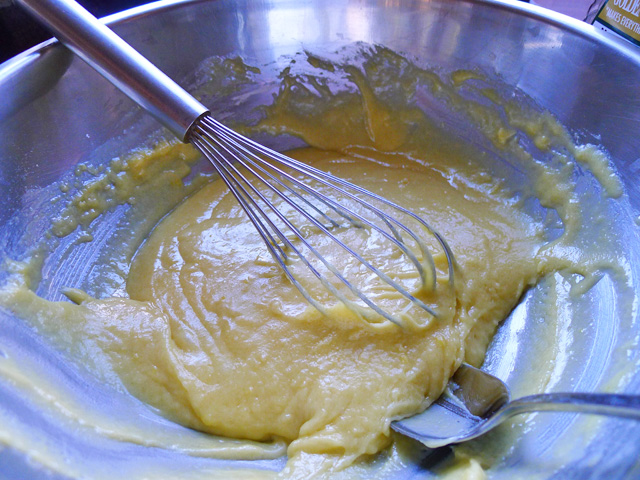
Chocolate Chip Cookie Dough

Sturdy stackable cookies

Jacques Torres Chocolate Chip Cookies
From The New York Times

2 cups minus 2 tablespoons cake flour
1 2/3 cups bread flour
1 1/4 teaspoons baking soda
1 1/2 teaspoons baking powder
1 1/2 teaspoons coarse salt
2 1/2 sticks unsalted butter
1 1/4 cups light brown sugar
1 cup plus 2 tablespoons granulated sugar
2 large eggs
2 teaspoons natural vanilla extract
1 1/4 pounds bittersweet chocolate disks or fèves, at least 60 percent cacao content (see note)
Sea salt.

1. Sift flours, baking soda, baking powder and salt into a bowl. Set aside.

2. Using a mixer fitted with paddle attachment, cream butter and sugars together until very light, about 5 minutes. Add eggs, one at a time, mixing well after each addition. Stir in the vanilla. Reduce speed to low, add dry ingredients and mix until just combined, 5 to 10 seconds. Drop chocolate pieces in and incorporate them without breaking them. Press plastic wrap against dough and refrigerate for 24 to 36 hours. Dough may be used in batches, and can be refrigerated for up to 72 hours.

3. When you are ready to bake, bring the dough to room temperature so that you can scoop it out, and preheat your oven to 350 degrees F. Line and/or grease your baking sheets. Scoop your dough out onto the sheets. I used a #40 ice cream scoop, which is about the size of 2 tablespoons, but you can make them even larger, if you like. Do not press the dough down – let it stay the way it is. Sprinkle the cookies lightly with a bit of fleur de sel or sea salt. Bake 10-12 minutes for smaller cookies (mine took about 13 minutes), or 18-20 minutes for larger cookies.

4. Allow the cookies to cool slightly on your baking sheet, then move them to another surface to cool completely. You can enjoy these warm, room temperature, or cold. Store in an air-tight container at room temperature for up to 3 days, or freeze for up to 2 months.

Yield: 1 1/2 dozen 5-inch cookies.

Note: Disks are sold at Jacques Torres Chocolate; Valrhona fèves, oval-shaped chocolate pieces, are at Whole Foods. I substituted Callebaut semisweet and Ghirardelli Bittersweet Chocolates. I also omitted the sprinkling of the sea salt. I would really like to try out the Jacques Torres chocolate especially after seeing this picture.

Milk and Cookies